Visit My Website

Visit My Website
Custom Personalized Candy Wrappers
Showing posts with label homemade. Show all posts

Thursday, October 11, 2012

Turn a Candle into Cinnamon Spice Candle

Buy a candle then create your own rustic, homemade-look cinnamon coated candle.

And, it will burn safely because the acrylic is water base.

So easy!

WHAT YOU NEED:
Candle - any size or color
Acrylic paint in brown hue
Paint brush
Candle holder to hold the candle while it dries
Ground cinnamon, nutmeg, clove or other ground spice

INSTRUCTIONS: Paint the candle, put into candle holder and let dry. Don't get carried away with brush strokes, pressing hard on the brush or repeatedly going over the wet paint.

Add a thick, heavy second coat.

While it's still wet, begin sprinkling the cinnamon over the candle.

Be sure to turn the candle once one side is covered and continue until the entire candle is coated in the spice.

Let dry.

That's it! That's all there is to this simple tutorial to create your own cinnamon spice covered rustic candle.

Please visit Visages for more rustic cards, invitations, postage, gifts, and more. Below are a few examples.

Country Blue Checks White Roses Bridal Shower Custom Invitation
Country Blue Checks White Roses Bridal Shower Custom Invitation by Visages
More Blue Invitations

Rustic Tree Branch Limb Bench & Flowers Canvas Print  
Rustic Tree Branch Limb Bench & Flowers Canvas Print
Rustic Tree Branch Limb Bench & Flowers Canvas Print by Visages
View more Rustic Canvas Prints

Personalized Western Cowboy Boots Cards
Personalize the message!
Personalized Western Cowboy Boots Father's Day Cards
Personalized Western Cowboy Boots Father Day Cards by Visages
View more Western Cards

Primitive Folk Art Snowman Holiday Party Personalized Invitation  
Antique Iron Horse Tough iPhone 3 Cover
Antique Iron Horse Tough iPhone 3 Cover by Visages
Browse another iPhone 5 cover online at zazzle.com

Ivy & Vines on Wood Fence iPhone
Ivy & Vines on Wood Fence iPhone by Visages
Shop for an iPhone 5 case online at zazzle.com

Wooden Trunk Chest with Buckles Mouse Pad
Wooden Trunk Chest with Buckles Mouse Pad by Visages
Design a unique custom mouse pad.

Postage Stamp Cowboy Christmas Snowman
Postage Stamp Cowboy Christmas Snowman by Visages
Make your own US photo stamps online at zazzle.com

Sunday, September 23, 2012

Old White Sheets Make Up Candy Corn Pillows

Worn out white sheets were given to me by our neighbor who lives down the road. They were lovely but unusable for bedding.

What to do with them? Recycle, upcycle and repurpose, of course!

The pictured candy corn pillow made from an old sheet was my first. It measures 11 inches on all sides. I have since changed my pattern measurements: 11 inches across the bottom; 13 3/4 sides all raw edge measurements.

Materials:
* white material of some sort
* straight pins
* scissors
* ruler
* newspaper (to make pattern)
* sewing machine (or sew by hand)
* fiber fill (I found an old unused pillow, ripped it open and used its filling)
* acrylic off white, dark orange like burnt orange or terra cotta, and gold. Basically you'll want to use colors that are muted and antique looking unless you prefer bright colors and you aren't going for the "primitive" look
* One inch flat brush
* Water to rinse brush

Measure and mark 11 inches starting at the outside corner and along the bottom edge of the newspaper.

Mark at 11 inches.

Measure upward (vertical) 13 3/4 along the outside edge and at the 11 inch mark, and mark both.

Now place a mark at five and a half inches between the two top (13 3/4) marks.

Lay the ruler down at the 11 inch and five and a half inch mark then draw a line to create one side.

Lay the ruler down at the outside corner and the five and a half inch mark then draw a line.

You now have the triangle. Cut out along the lines.

Pin the cutout triangle onto your fabric and cut out the shape.

Or fold the fabric, pin on the newspaper pattern and cut out two shapes at once.

Remove the pins and paper pattern then repin the fabric pieces together.

Sew quarter inch seams leaving an opening large enough at the bottom to stuff fiber fill.

To really make the pillow look like candy corn, don't make triangle points. Instead, sew curves at each point (semi-circles).

Cut off the points and snip the now-curved points of the triangle.

Turn right side out and stuff. Make sure to poke the stuffing well into the corners so they'll hold their shapes.

Sew closed using a simple stitch of your choice (like a whip-stitch).

TO PAINT:

Load your flat brush into gold and draw a line about three inches up from the bottom on one side of the pillow. Fill in the space from the line you made to each seam.

Rinse brush, load with terra cotta. Draw a line two and a half to three inches from the top. Fill the space between the gold and the orange line and side to side using the seam as the stopping point.

What we're doing is just painting one side of the pillow. Then we'll let it dry and repeat the process on the other side.

Rinse brush.

Paint the tip of the candy corn with off white.

After the paint dries, do the same thing to the other side of the pillow.

The paint will dry stiff. Leave as is OR sand it a bit to soften it. Don't get over-zealous with the sandpaper. You'll remove all the work you did painting.

 Cute Country Scarecrow Matching Postage
Cute Country Scarecrow Matching Postage
Cute Country Scarecrow Matching Postage by Visages
See more Matching Stamps

Cute Halloween Scarecrow Folk Art Rectangular Cake Picks 
Cute Halloween Scarecrow Folk Art Rectangular Cake Picks
Cute Halloween Scarecrow Folk Art Rectangular Cake Picks by Visages
Shop for more Cake Picks at zazzle.com

Cute Halloween Jack OLantern and Crow Custom Invitations
Cute Halloween Jack O'Lantern and Crow Custom Invitations
Cute Halloween Jack O'Lantern and Crow Custom Invitations by Visages
Design a personalized invitation at Zazzle

Cute Halloween Jack O'Lantern and Crow Postage Stamp
Cute Halloween Jack O'Lantern and Crow Briefmarke
Cute Halloween Jack O'Lantern and Crow by Visages
More Cute Stamps

I Heart (Love) Halloween Tote Bags 
I Heart (Love) Halloween Tote Bags
I Heart (Love) Halloween Tote Bags by Visages
More Love Bags

Princes Pumpkin Halloween Party Invitations 
Orange Halloween Envelope
Orange Halloween Envelope by Visages
Order envelopes from zazzle

 Halloween Princess Pixie Shirt

Thursday, August 30, 2012

Repurpose Old Used Lace Curtain in a Wine Bottle Cover

I will admit right here, right now that I dumpster dive. It's difficult for me to see a promising pile set out at curb-side and not investigate.

It was in a pile set on the curb that I found several lace curtain panels I washed, folded and set aside until I could find a new purpose for them like this cute wine bottle cover tied with a discarded ice skate shoe lace.

Pattern: Take a sheet of newspaper, unfold it and lay the bottle on its side then with a pencil or marker trace the perimeter of the bottle holding the pencil straight up (90 degrees to the paper) and against the glass bottle.

It doesn't have to be perfect.

Cut the paper pattern about a half an inch outside the line you drew then  wrap the pattern around the bottle to ensure there's enough material for the seam.

It took a couple of times of drawing then cutting before the paper overlapped enough for a decent size seam.

Sew it: Fold the top of the cover over about a quarter of an inch and stitch then fold the entire cover in half long ways with the inside of the cover facing out.

Stitch a quarter inch seam the length of the cover then slip it over a wine bottle.

Bow: Weave the shoe lace through the holes in the lace curtain, tie a bow then clip the ends if they're too long.

Keep for yourself, slide over a full bottle of wine for the host and hostess of a party or give as a gift.


Find bridal shower, baby shower, Halloween, Christmas and many other party invitations at Visages.

Here are just a few examples:


Cute Folk Art Scarecrow Invitation Announcement
Cute Folk Art Scarecrow Announcement
Cute Folk Art Scarecrow Announcement by Visages
View more Halloween Invitations

Chocolate Brown and Pink Peony Bridal Shower Invitations 
Chocolate Brown and Pink Peony Bridal Shower Invitations
Chocolate Brown and Pink Peony Bridal Shower Invitations by Visages
Create an announcement on zazzle

Cute Country Red Gingham Checks Baby Shower Personalized Invitations
Burgundy and Pink Peony Bridal Shower Personalized Invites
Burgundy and Pink Peony Bridal Shower Personalized Invites by Visages
Browse other Pink Invitations

Country Blue Checks White Roses Bridal Shower Custom Invitation 
Sunflower Bridal Shower Announcement
Sunflower Bridal Shower Announcement by Visages
Design blank invitations online at zazzle.com

Cute Folk Art Cowboy Snowman Christmas Personalized Announcements
Primitive Folk Art Snowman Holiday Party Personalized Invitation
Primitive Folk Art Snowman Holiday Party Personalized Invitation by Visages
Browse other Primitive Invitations

Cute Halloween Jack O'Lantern and Crow Custom Invitations 
Cute Halloween Jack O'Lantern and Crow Custom Invitations
Cute Halloween Jack O'Lantern and Crow Custom Invitations by Visages
Design invitations online at Zazzle.

White Rose Formal Wedding Invite Personalize
White Rose Formal Wedding Convite Personalizado
White Rose Formal Wedding Convite Personalizado by Visages
Shop for an announcement on zazzle

Personalized Garden Fairy Folk Art Boys Birthday Invites
Personalized Garden Fairy Folk Art Boys Birthday Invites by Visages
Browse other Flowers Invitations

Personalized Garden Fairy Folk Art Girls Birthday Personalized Invite 
Personalized Garden Fairy Folk Art Girls Birthday Personalized Invite
Personalized Garden Fairy Folk Art Girls Birthday Personalized Invite by Visages
See other Flowers Invitations

Cute Country Angel Watering Flowers Invitation Announcements 
Cute Country Angel Watering Flowers Announcements
Cute Country Angel Watering Flowers Announcements by Visages
Browse more Cute Invitations

Butterflies and Flowers Blank Invitation 
Butterflies and Flowers for Invitation
Butterflies and Flowers for Invitation by Visages
Create a personalized announcement at zazzle

Christmas Santa Flies Invitation
Santa Flies Invitation
Santa Flies Invitation by Visages
Get the best in invitation printing online at Zazzle.

Fall Scarecrown with a Pumpkin Invitation
Fall Scarecrown with a Pumpkin Invitation by Visages
Create an invite online on Zazzle

Kitty Cat Picture Christmas Invitation

Sunday, June 17, 2012

Fork Hook on Old Wood

This was a fun project and one I created for the antique/gift store, Gramma Sophie's, in Boonville, MO.

A fork bent into the shape of a hook then screwed to an old weathered, beat up board with an Americana scene painted in acrylic paints can serve as a decorative hat or coat hook. (Use a small screw that will fit between the tines of the fork.)

When changing out your decor for Flag Day, Veterans Day, Memorial Day or 4th of July, this primitive piece will grab the attention of friends or family who come to visit.

Background: The sky was quickly slapped on with a hint of creamy white. The trees on the horizon were painted with a sage green  using only the chisel edge of an old, worn out half inch brush. The right side of the trees were darkened with old ivy.

Grass: There is really only a hint of grass created by laying the brush horizontally and skipping around from back to foreground with sage green. Then with old ivy, add a few dark areas.

Barn: Base coat the barn in dark red then shade with diluted black or midnight. Paint the roof line in black. Add the door and loft window in black. Highlight the left edge of the door and window with creamy white. Dry brush in highlights with creamy white.

Path: A combination of light and dark browns (like latte and burnt umber) were slapped on.

Weeping Willow Tree: Paint the trunk of the tree with a light brown using the chisel edge of a half inch brush then shade the right side with burnt umber.

Using a 1/4 inch brush and old ivy, push in the leaves by tilting the brush, pushing and lifting to create a tear drop shape.

Sheep: Base coat the sheep in creamy white then float the shading around the edges with burnt umber. Add the black face, ears and legs by creating simple shapes with a 1/4 inch brush. With the 1/4 inch brush, paint a small blue square then add two dark red stripes. Stencil in a star on the blue square.

Border: Alternate dark red and creamy white using a half inch brush then float shading with burnt umber on both the inner and outer edges of the border.

Don's forget to add either sawtooth or wire hangers.

Thursday, June 7, 2012

What to Do with an Old Window Screen

If you're looking for something unique to do with an old window screen, here's a fun idea.

I grabbed my acrylic paints and set to work painting a birdhouse on a leafy vine-wrapped tree stump. First I used dark colors applying two or three coats. Next, I took bright yellow and highlighted areas to add definition.

You will want to spread newspaper or something underneath the screen because there will be a fine splatter of paint.

After it dried I sprayed a layer of lacquer over the paint to preserve it.

Lastly, I anchored and strung picture hanging wire to the back.

Today while I'm in Glasgow, MO, I'll take it to Glasgow Trading Post antique shop and gift store where it will hang for sale for only $10.
Now THAT'S a fun idea.

Looking for gifts you can personalize? Head to Visages to check out original art & designs you won't find anywhere else. Below are a couple of gift ideas.

Father's Day is June 17.

Tuesday, June 5, 2012

How to Make a Dime-'n-Pin Gag Gift


Making your own gifts is fun. Making your own gag gifts is even more fun.

This Dime-'n-Pin is a pun for diamond pin, and is used to generate surprise and a chuckle. When you ask someone “Would you like a dime-n-pin?” (say it quickly as you would diamond pin) the general response is, “Sure!”. When you produce and the recipient sees the the dime you have soldered on to a safety pin their first expression is puzzlement which is followed by laughter.

This is a good way to break the ice, have some fun, or to give as a unique gift.

Needed:

  1. Dime
  2. Safety pin – large enough to unclasp once it is soldered to the dime
  3. Solder – Radiator with flux
  4. Needle-nose Pliers (or needle-nose vice grips)
  5. Propane torch
  6. Lighter or matches
  7. Pan of water
  8. Solid work surface

Set up your work area in a safe place where propane and other fumes won't contaminate the air. Your table should be sturdy and not wobble so as not to upset the lit propane starting a fire. Once you have set the propane tank on your work table ensuring that it won't easily tip, twist the nozzle open just enough so that you hear a slight hiss.

Hold the lighter (or lit match) below the nozzle but up high enough that when you light the lighter the flame or spark will ignite the gas you hear hissing from the opening of the tank.

DO NOT FULLY OPEN THE NOZZLE. You want it open only enough to keep a steady flame.

Lay a safety pin on the back of a dime. The head stamped on the dime should be in the same upright position as and perpendicular to the safety latch of the pin. Clamp the needle-nose pliers on the edge of the dime making sure you have also clamped the pin. Slightly lift the pin so there is no problem unclasping the it when it is put on or taken off.

I like to use the needle-nose vice grips which are self-clamping so I don't have to concentrate on keeping the pliers closed with enough pressure to hold the pin and dime.

Hold the face of the dime in the flame and apply the solder with the other hand on the back surface of the dime also touching the bottom leg of the pin (the part of the pin that doesn't move). When the dime heats enough to melt the solder, remove it and the dime immediately from the flame as it will continue to melt covering more area than you want.

With the pin now soldered into place, remove it from the flame and dunk into a pan of water to cool the pliers as well as the dime.

This is a how-to article only. Use the instructions at your own risk.

New Father's Day gifts at Visages

Monday, January 16, 2012

How to Paint a T-shirt with Acrylic Paints


How to Paint a T-shirt with Acrylic Paints

What? Acrylic paints on a shirt?

You read right... Regular acrylic paint can be used on fabric. You don't need special fabric paints that are expensive - much more expensive than regular craft acrylic paint.

And after the paint dries, it won't fade or wash off when you do laundry. I've had two t-shirts I painted a year ago and the colors are still intact and just as vibrant as the day I painted them.

Supplies:
A design... for ease just use your favorite stencil. Don't have one? Get graphite paper and trace your design on the side of the shirt you are painting (Instructions at the bottom)

Acrylic paint in the plastic bottle although you can use the more expensive tube paint

Sponge dabber or pouncer to pounce on the paint, or paint brushes if you traced a design

Cardboard to put under the layer of fabric you're painting. I use old pizza cardboard rounds after they've set for a couple of days and dried out. Or find an old cardboard box and cut out a section large enough to accommodate your design

Small container of water to rinse your brush

Some paper towel to absorb the excess water from your brush

Plastic plate or something to hold a squirt of paint

Stencil design:

Slide the cardboard between the shirt layers positioning it where you are painting your design – front or back. With straight pins, pin the cardboard into place through the side of the shirt you're painting. Slant your pins rather than pushing them straight through. If you don't, you'll find out why I suggest you do. 'Nough said.

Tape your stencil into place using masking or painters (blue) tape. I like the blue painters tape because it lifts easily; isn't so hard to remove.

Time to paint!
Grab a color... any color... your favorite color and squirt some into a plastic plate. If you squirt too little, no problem. You can just squirt more as needed.

Squirted too much? No problem... when you're done, take the top off the bottle, grab a brush or use your finger, scoop it up and add it back into the bottle scraping your brush or finger along the lip line so that the paint flows inside.

Wet your dabber/pouncer then squeeze out the water with the paper towel. Pounce it into the paint then begin pouncing the stencil shape design.

Be sure to pounce and not drag it as the paint will seep under the stencil.

Note that the material of the t-shirt soaks up the paint. This is okay but I do suggest using a good gob of paint.

As you pounce, you'll see less and less paint transferred onto the material. Dab your pouncer often into the paint so you get good coverage.

And listen... there isn't one piece... NOT ONE PIECE of art out there that is perfect. Ask any artist and they will tell you where there are mistakes in their work.

No lie...

So, if you feel your shirt isn't perfect so what? Unless you've done one horrible... and I mean horrible job of pouncing nobody will notice. In fact, you'll get compliments on your shirt.

Where'd you get that shirt?” “Did you make that shirt?” “Can you make one for me?”

Okay, you've finished pouncing your shirt.

Leave the stencil in place until the paint is fairly dry. Holding the stencil in place with one hand, peel the tape off with the other hand.

Lift the stencil straight up.

Wash off the paint from the stencil using straight warm water.

Leave the cardboard in place until the shirt is completely dry. If you don't, the paint will soak into the underside – or the second layer – of the shirt if you remove the cardboard too soon.

Once completely dry, remove the pins and cardboard. Some of the cardboard may stick to the shirt. It will come off with the first wash.

Now some suggest you throw the shirt into the dryer to set the paint.

I have not found this to be true. I have never dried to set the paint. I simply wait until the paint is dry – 24 hours - then I wear it.

Suggestions:
Stencil acrylic paint on jeans, cloth napkins, jackets, baby onsies/body suits, socks, dish towels, area rugs, sweatshirts, tote bags, edges of sheets or table cloths... Only your imagination will get into the way of thinking of ways to use this creative way to decorate material.

Tracing designs onto your t-shirt with graphite paper:

Using blue painters tape which is easily removed, tape only one edge of your design onto your shirt. You could also pin the paper design along one edge.

Slide the graphite tracing paper - graphite down - between your picture and the shirt material then on a hard surface begin transferring with a ball point pen.

Don't press too hard or you'll go through the papers.

Every so often you can lift the paper and graphite paper to see where you are or what you have missed. Just make sure you don't allow the design to shift or move in any way. Other wise you'll have part of the design in one area and continuing in another. 

To the right is a black t-shirt I painted for my mother. She was so proud of it, she wore it to church the very day I delivered it.

For all of my original designs (NEVER sell designs you've traced that belong to someone else), I charge the cost of the shirt plus $10. Cheap when you consider the time put into it but I tell you, people LOVE the thought of a hand painted shirt.

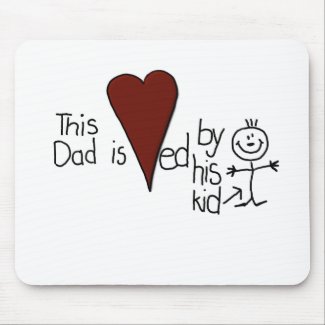
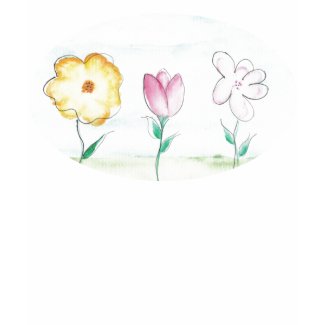
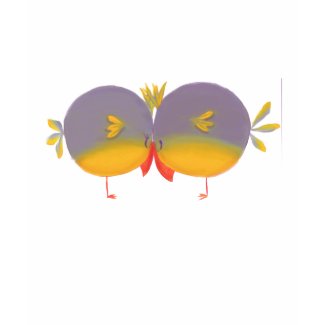
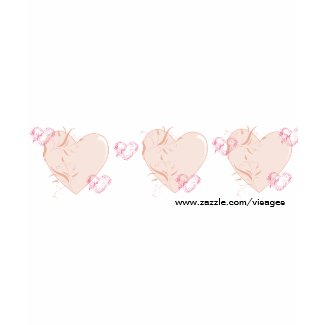
You can find more original designs at my online store, Visages.

Below are some of my newest designs many of which you can personalize with a name or your own quote or saying!


Got What I Wanted shirt
Got What I Wanted by Visages
Browse other tees made on zazzle
Panda Bear Chef Likes Honey Badgers shirt
Panda Bear Chef Likes Honey Badgers by Visages
Browse zazzle for a different shirtzazzle