T
Turn an old window frame with glass panes into a work of art then add screw-in hooks at the top and hang.
I found this old window along with three others sitting in a disposal bin on the porch of a very old house that was being torn down. I wrote a note asking the owner to contact me in regards to the fate of the windows then taped the note to the door. A couple of days later, I was contacted and after a bit of negotiation the house owner told me he'd call when all the windows were removed and that I could have them for a dollar a piece. The price allowed me very little investment and an opportunity to turn it into ten to twenty times profit.
What you'll need:
Old window frame with glass
Ammonia
Vinegar
Bucket
Newspaper
Scrub brush
Acrylic paints in a tube or for crafts
Enamel paints for glass (optional)
Brushes
Water
Paper towels
Remove any old nails or tacks you find.
Fill the bucket with warm water, a bit of ammonia and vinegar. Using your scrub brush dipped in the ammonia mixture, begin scrubbing the wood window frame. Don't use a lot of pressure. You want to leave the paint intact while removing loose paint and putty.
Once the frame is clean, scrub the glass panes and dry with crumpled newspaper. Newspaper is great for cleaning windows. It doesn't leave lint behind nor streaks.
Turn the window around, scrub the frame and the glass as above.
Let dry thoroughly before you begin.
The scene you see painted on the window glass in the above picture is loosely based on the fields I see when driving from Fayette, MO, to Boonville. And because I love butterflies and flowers, I added them into the foreground.
Put your window frame on a table with the back side of the window facing you. Using your largest brush, wet and squeeze out the water with a paper towel. The brush should be barely damp. Dip your brush into the paint and work it in so all the bristles are coated then dip again grabbing lots of acrylic paint and paint your background scene. In the above picture, I painted a blue sky and green rolling hills; nothing else. The rest of the scene was painted on the front of the glass. This gives the painting some dimension.
Don't skimp on the paint because you want good coverage. And don't go back over the fresh wet paint because you'll end up removing what you just painted since the wet acrylic hasn't adhered to the glass.
If you must go back over areas, wait for the paint to completely dry and use a light touch.
Flip your window pane over making sure you don't allow the wet acrylic paint to touch anything. Or, grab a hair dryer or fan to speed the drying process then flip over the frame.
Begin with the objects furthest back and begin laying in the second part of the background. In the painting above that would be the clouds, purple flowers on the hills and trees on the horizon.
Using a fairly dark purple, pounce the purple flowers on the grassy hills.
With a fairly dark green, pounce in the trees on the horizon.
Use an off white to scrub in the clouds.
Let dry, or use the hair dryer or fan technique to speed up drying.
Darken the bottom of the clouds with burnt umber (or another dark color like dk blue); highlight the edges with bright white.
Highlight the trees with yellow.
Highlight the purple flowers with a mix of purple and white.
Be sure to leave dark areas in the trees and purple flowers for dimension.
Let dry.
Begin laying in the foreground of bare tree limbs (no leaves, no flowers) coming in from the sides at the top of your painting and the flowers at the bottom.
I layered the flowers which means I had to let the previous layer dry before continuing.
After the bare tree limbs have dried, add leaves and mossy yellow/green highlights.
Let dry then add more defined leaves on the left tree and the flowers on the right tree with a combination of enamel and acrylic. The enamel paint has shine which adds interest.
There is always a bit of worry when I paint on glass that I might screw up the finished bottom layer, and will have to scrape off all the painting I did with a razor.
On the other hand, being able to scrape off paint is a life saver.
If you mess up on clean glass (not yet painted), just wipe with a damp paper towel, let dry and begin again.
I have actually messed up an entire painting and had to scrape off everything I did to begin again. It's a pain but at least the option is there.
You are welcome to use this design non- and commercial. If you post it on the web, just give me credit.
After posting this blog, several days later I found this awesome blog showing loads of different ways to use/repurpose old windows.
Check it out...
And please visit my web gift store,
Visages.


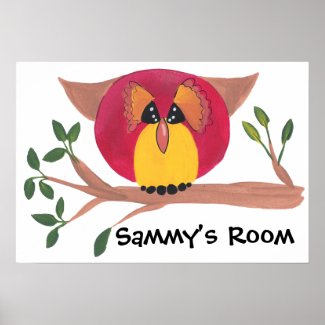
 Here are three primitive acrylic painted owl projects for your consideration.
 Finally, at the far right is a wall plaque made from an old piece of barn wood framed with leftover trim I found laying in the basement of my house. It was painted black before the three primitive owls were added. Again, these owls are basic shapes but the bottom two owls have big, sad eyes with three highlights.