Visit My Website

Visit My Website
Custom Personalized Candy Wrappers
Showing posts with label easy. Show all posts

Friday, October 26, 2012

Primitive Burlap Fabric Candle Jar or Coffee Cup Coasters

Coasters for candle jars, beverage or drinking glasses, coffee mugs or cups sell well at a shop I consign in, Gramma Sophie's in Boonville, MO.

I don't make them for her, another lady does but given that they tend to sell I decided to try my hand at making and selling them at Glasgow Trading Post.

I wanted to create something rustic, country and very easy to sew which to me means primitive. I wanted to sew coasters women wouldn't fear would get stained and I priced them at $2.00 each making them affordable to replace.

They measure five inches.

Each square is simply a five-inch piece of burlap fabric folded in the middle and ironed flat then placed on burlap backing and "woven" if you will to create a checked effect.

For instance, I laid two off white folded pieces - rough edge out - so the folded edges meet in the middle and even with the back's edges.

Then I laid a brown piece perpendicular to the off white - folded edge in the center and even with the back plus the two ends of white burlap - lifted an end of a white and laid an end of the brown beneath it, then did the same to the other side.

Again: rough edges facing out, lay down two pieces of fabric so the edges are even with the back and folded edges meet in the middle.

Lift one end of one of the pieces and slide another color beneath it, rough edge out and perpendicular. Line all the edges so they're even.

Turn and repeat so that you have created a checker board.

I pinned then sewed the edges.


You can even make triangles using the same method. Clip the corners and turn right side out.

You can make them virtually any size. The purple and off white (right) are four inch while the prints (bottom left) are six.


Personalized coasters for great gifts at Visages.


Red Barn Autumn Trees Drink Coasters
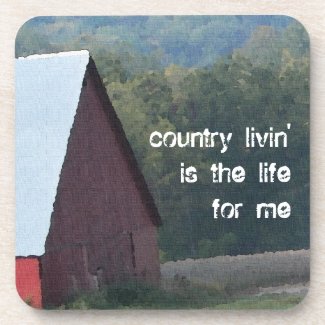
Red Barn Autumn Trees Drink Coasters by Visages
Browse other Red Cork Coasters

Competition Sailing Catamaran Picture Coaster 
Competition Sailing Catamaran Picture Coaster
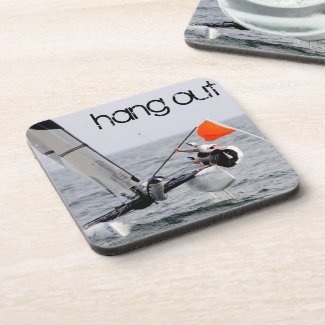
Competition Sailing Catamaran Picture Coaster by Visages
View other Sail Cork Coasters

Jib Sail and Mast Picture Drink Coaster 
Jib Sail and Mast Picture Drink Coaster
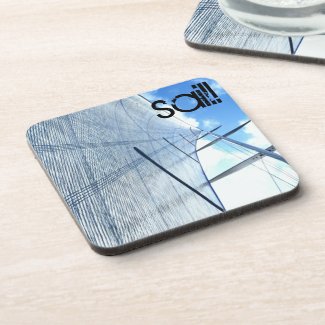
Jib Sail and Mast Picture Drink Coaster by Visages
Browse other Sail Cork Coasters

Cute Christmas Primitive Snowman Beverage Coaster 
Cute Christmas Primitive Snowman Beverage Coaster
Cute Christmas Primitive Snowman Beverage Coaster by Visages
Create a personalized coaster on Zazzle.

Cute Christmas Primitive Snowman Coaster
Cute Christmas Primitive Snowman Coaster by Visages
View other Cowboy Cork Coasters

Cute Country Scarecrow Folk Art Drink Coasters 
Cute Country Scarecrow Folk Art Drink Coasters
Cute Country Scarecrow Folk Art Drink Coasters by Visages
Create unique custom made coasters at Zazzle

Cute Christmas Cowboy Snowman Drink Coaster
Cute Christmas Cowboy Snowman Drink Coaster by Visages
More Cowboy Coasters

Funny Cartoon Duck Beverage Coaster 

Monday, October 22, 2012

Primitive Grunge Pumpkins Project out of White Material

Very easy to make are primitive grunge pumpkins for Halloween or Thanksgiving decorations using:
  • an old white sheet or pillow case
  • jute twine or string
  • acrylic paint
Using the large pumpkin for the example:

Pumpkin:

Measure and cut 2 pieces 8 inches wide by 16 inches tall.

Make any size by doubling the second measurement i.e. 5x10, 6x12, etc.

 Starting with a long side, sew down then across the short bottom and back up the other long side.

Three sides are now sewn.

Turn right side out so the seams are now inside.

Loosely stuff.

Gather the top (bunch it up) and hand sew closed.

I used a large flat brush to paint and really  loaded the paint brush with paint.

Paint with an orange shade of your choice one side at a time because you need to lay it down to dry.

Allow to dry.

Paint the other side.

Allow to dry.

Paint the top and bottom.

After it's dry, wrap jute twine around one side pulling the string to create creases. Cut the string but make sure you leave yourself two tails to tie.

Repeat around the other side.

I didn't cut the ends back after tying. I left them long.

Stem:

1 1/2 inches wide by 2 1/2 inches tall

While the pumpkin is drying, stitch three sides of the stem leaving a short side open.

Turn right side out so seams are inside.

Loosely stuff.

Paint green.

Once dry, hand sew to the top of the pumpkin.

I added more grunge with nutmeg color acrylic.

Complete the look by grunging a small taper candle with nutmeg color acrylic paint and cinnamon.

Thanks so much for stopping by!

Scarecrows Pumpkins Autumn Picture Personalized Invitation
Scarecrows Pumpkins Autumn Picture Personalized Announcements
Scarecrows Pumpkins Autumn Picture Personalized Announcements by Visages
Create unique customized invitations on zazzle.

Pumpkins and Mum Autumn Picture Tote Bags
Pumpkins and Mum Autumn Picture Tote Bags by Visages
See more Pumpkins Bags

Pumpkins and Mum Autumn Picture Card 
Pumpkins and Mum Autumn Picture Card
Pumpkins and Mum Autumn Picture Card by Visages
Create your own invitations.

Pumpkins and Mum Autumn Picture iPhone 5 Cases
Pumpkins and Mum Autumn Picture iPhone 5 Cases by Visages
Browse other Pumpkins Casemate Cases

Cute Country Scarecrow Folk Art Throw Pillows 
Cute Country Scarecrow Folk Art Throw Pillows
Cute Country Scarecrow Folk Art Throw Pillows by Visages
See other Folk Pillows

Cute Country Scarecrow Matching Postage 
Cute Country Scarecrow Matching Postage
Cute Country Scarecrow Matching Postage by Visages
Browse more Matching Stamps

Princes Pumpkin Halloween Party Invitations 
Ghostly Halloween Eyes Card
Ghostly Halloween Eyes Card by Visages
Browse more Spooky Cards

Octoberfest Get Me a Beer Mugs or Steins 

Wednesday, September 26, 2012

Repupose and Upcycle Old Cutting Boards

Taking things - discarded items nobody wants - and turning them into decorative and sometimes even useful items has become a challenging pastime.

For instance, take the two cutting boards pictured to the left. I considered turning them into shelves or even racks for towels or jackets but in the end decided to keep it simple by painting uncomplicated images on them.

A painted star and burning candle on the plain wood of this paddle cutting board was something I'd been considering for some time.

The stenciled star was painted in antique gold and is surrounded by burnt umber. Burnt umber was dry brushed along the inside edges of the star.

The candle stick consists of a straight line using barn red and a half-inch brush, a float of burnt umber on the left while on the right is dry brushed white. The flame was created using one stroke of antique white with yellow, orange and blue layered on top. A hint of a wick was added. Burnt umber, black or grey will work fine for it.

Lastly, antique white was dry brushed around the flame up into the bottom of the star.


The cat silhouette board was based with one layer of black wash then multiple layers and colors (nutmeg, gold then antique white) were slapped on with abandon to create a background for the silhouette.

The cat silhouette was painted using a flat one inch brush loaded with black. Basic shapes in multiple layers of black were used for all parts than a hint of a shadow using burnt umber was added along the right edge.

A hole was drilled at the center top of the board and a piece of scrap material was poked through and tied in a knot to be used as the hanger.

A simple day project to create simple, country primitive decor for you or as gifts.

Have fun!

Please visit my online gift store, Visages


Cute Folk Country House and Picket Fence Art Poster

Cute Folk Country House and Picket Fence Art Poster
Cute Folk Country House and Picket Fence Art Poster by Visages
More Dragonflies Posters

Kitty Cat Christmas Picture Rectangle Stickers 
Kitty Cat Christmas Picture Rectangle Stickers
Kitty Cat Christmas Picture Rectangle Stickers by Visages
Browse other Christmas Stickers

  Schipperke Picture Trucker Hats
Schipperke Picture Trucker Hats
Schipperke Picture Trucker Hats by Visages
See other Little skipper Hats

  Owl Porcelain Candy Jar
Owl Porcelain Candy Jar
Owl Porcelain Candy Jar by Visages
See more With owl Candy Jars

  Funny Ferrets Shirts
Funny Ferrets Shirts
Funny Ferrets Shirts by Visages
Get the best in online t-shirt printing from zazzle.com.

 Who da Man? 3 Retro Colored Owls Spiral Note Books
Who da Man? 3 Retro Colored Owls Spiral Note Books
Who da Man? 3 Retro Colored Owls Spiral Note Books by Visages
Find other journals at Zazzle

 Colorful Painted Butterflies Mouse Pads
Colorful Painted Butterflies Mouse Pads
Colorful Painted Butterflies Mouse Pads by Visages
Check out more mouse pad.

Panda Bear Picture iPhone iPhone 5 Covers
Panda Bear Picture iPhone iPhone 5 Covers by Visages
Check out more covers for iPhone 5

Cute Nursery Room Bird Cartoon Gallery Wrapped Canvas 
Cute Nursery Room Bird Cartoon Gallery Wrapped Canvas
Cute Nursery Room Bird Cartoon Gallery Wrapped Canvas by Visages
View more art printed on canvas on Zazzle

First Mothers Day Baby Bird Greeting Cards
First Mothers Day Baby Bird Greeting Cards by Visages
Browse other Greeting Cards

Picture of Panda Bear Chef Posters 

Sunday, September 9, 2012

Upcycle Repurpose Vintage Glass Vacuum Coffee Maker

Create a lovely candle holder with a vintage vacuum coffee pot with little effort like I did with this one given to me by some folks who were cleaning out their vacation country home in Missouri.

Remove the metal and ceramic internal parts.

There is no need to remove the glass vacuum tube (tube attached to upper deck of pot).

Fill the bottom with imitation rose buds and leaves, or buttons, or old wooden thread spools, or marbles, or just anything that suits your fancy.

I chose imitation rose buds and leaves 1) because they match the Christmas candle I painted and 2) they are the only thing I found at the second hand (thrift) store I was attracted to and that fit my budget of $1.

Put the upper half of the coffee pot back on, tie a torn strip of scrap fabric matching the color you added to the bottom part of the pot (or your decor) then insert a pillar candle.


This is certainly an eclectic idea and so easy, so fun and just plain so unique.

Get an "I upcycle & repurpose" tee at Visages Gift Store.