Visit My Website

Visit My Website
Custom Personalized Candy Wrappers

Wednesday, June 27, 2012

Upcycled or Recycled Old Wooden Bowl

Cheryl, owner and operator of Gramma Sophie's in Boonville, MO, handed me an old wooden bowl (I paint art on items for her to include in her sale inventory) that originally had fruit painted inside by someone. There was a hand-written date on the bottom that read 1949. Cool.

I painted the bowl black, added a red/orange border then set to work painting pumpkins, leaves, curly vines and the word Autumn.

Pretty simple, really and done in the tole painting method including dry brushing yellow highlights.

What a great way to get ready for Fall.

I Heart (Love) Halloween tees, cup or mugs, tote bags and hat (ball cap) at Visages.


Sunday, June 24, 2012

Repurpose Headboard and Footboard to an Antique Baby Bed

 While touring the back of Glasgow Trading Post Antique and Gift Shop, Donnie, the owner, and I stumbled upon an ancient wooden headboard, footboard and railings to an old baby bed. They were filthy; covered in dirt from years of being stored in what used to be an old meat locker now serving as GTP's antique portion of the store.

Eager to get my own hands on them, I told Donnie he could repupose them into shelves but being a store owner makes Donnie a busy guy. After all, he has to find and purchase antiques to stock his store. I was more than happy to grab the stuff and take them home to begin the projects.

What you need:
Water
Scrub brush
Paint (colors of your choice)
Paint brush(es)
Pen or pencil
Wood plank appropriate for a shelf or
Bench
2 Steel L-brackets with wood screws
Drill and bits
Screwdriver

Cleaning: I sprayed down the antique bed parts with a hose, scrubbed them with a brush then let them dry for a couple of days.

Paint: Acrylic in any color you want. Since these items were being placed in the store for sale, I used off white and antiqued with burnt umber for the shelf. The bench back was painted with a combination of black and midnight on opposite corners of the brush. Both projects were painted prior to assembly.

Let dry.

Shelf assembly: The shelf wood was all ready at a perfect width. You may have to cut your shelf to match the width of your headboard or footboard.

I purchased two 2-inch steel L-brackets for each project. Lay one of the L-brackets on the back of the shelf wood and mark your holes with a pen or pencil. Do the same on the other end. 

Using a drill bit that is a tad smaller than the wood screw, I drilled two small pilot holes on each end of the shelf then screwed the brackets onto the wood using the wood screws that were provided with the L-brackets.

Lay the headboard or footboard on your work table then the shelf on top of that. Center and mark your holes then drill the pilot holes and screw the shelf into place.

Easy peasie!

Bench: Simply follow the instructions for the shelf to assemble the back to your bench. Make sure the V-shape of your L-brackets face downward otherwise the headboard or footboard will have a lot of movement in it and seem unstable.

Friday, June 22, 2012

Patriotic July 4th Indepence Day Crafts

 Terra cotta pots: Paint primitive pictures like sheep, stars, crows, and simple Uncle Sam hats in red white and blue on terra cotta pots with acrylic.

Plant your favorite flower or plant then set it out on your porch or deck to add a bit of patriotic charm to the outside of your house.

Or, to give the inside of your house some old country primitive charm, add Styrofoam inside the pot, glue moss on top and add a wire curly cue to hold a picture then set on your coffee table of picture shelf.

 Burlap and muslin candle jar wraps: Again using acrylic, paint primitive sheep, willow trees, Uncle Sam hats, barns, fences, out buildings and stars in patriotic red, white and blue. Then sew around the edges (shown are candle jar wraps with raw edges) and velcro at both ends then set around the house to mingle with your gorgeous antiques.


 Old vintage (antique) window and frame: Using acrylic and the same patriotic colors to keep with my Forth of July theme, I painted trees, barn, out building and a hint of grass on one pane. Below it on the next pane of glass, I painted three very simple cat shapes with eyes. Change out with a piece of wall art you've grown weary of...
Jar: Take an empty jelly jar, free hand stripes, stencil in some stars, add a votive in a glass votive holder and you've got yourself a pretty candle holder to light up an Independence Day evening.

Note: For your glass projects, wipe down with alcohol and let dry. You'll need to paint several layers for the glass to look right so be sure to let the paint dry between coats.


You can find these items for sale at Gramma Sophie's in Boonville, MO.

For other gift items with original art, head to Visages where you can personalize many of the items.
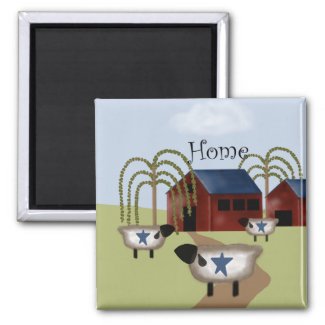
Primitive Americana Barn and Sheep Refrigerator Magnets
Add a touch of primitive to your kitchen with barn, sheep, and stars on a magnet ...
Primitive Americana Barn and Sheep Refrigerator Magnets by Visages
Make a unique customized magnet at Zazzle.
Red Rose Thank You Greeting Card
Red rose photograph was taken in Fayette, MO, by Deborah Miller
Red Rose Thank You Greeting Card by Visages
Browse more Red Cards
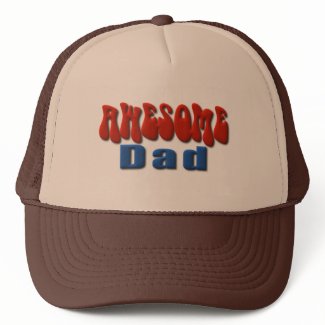
Blue & Red Awesome Dad Hat
A hint of sixties style with an Awesome Dad hat
Blue & Red Awesome Dad Hat by Visages
Browse more Awesome Hats

Sunday, June 17, 2012

Fork Hook on Old Wood

This was a fun project and one I created for the antique/gift store, Gramma Sophie's, in Boonville, MO.

A fork bent into the shape of a hook then screwed to an old weathered, beat up board with an Americana scene painted in acrylic paints can serve as a decorative hat or coat hook. (Use a small screw that will fit between the tines of the fork.)

When changing out your decor for Flag Day, Veterans Day, Memorial Day or 4th of July, this primitive piece will grab the attention of friends or family who come to visit.

Background: The sky was quickly slapped on with a hint of creamy white. The trees on the horizon were painted with a sage green  using only the chisel edge of an old, worn out half inch brush. The right side of the trees were darkened with old ivy.

Grass: There is really only a hint of grass created by laying the brush horizontally and skipping around from back to foreground with sage green. Then with old ivy, add a few dark areas.

Barn: Base coat the barn in dark red then shade with diluted black or midnight. Paint the roof line in black. Add the door and loft window in black. Highlight the left edge of the door and window with creamy white. Dry brush in highlights with creamy white.

Path: A combination of light and dark browns (like latte and burnt umber) were slapped on.

Weeping Willow Tree: Paint the trunk of the tree with a light brown using the chisel edge of a half inch brush then shade the right side with burnt umber.

Using a 1/4 inch brush and old ivy, push in the leaves by tilting the brush, pushing and lifting to create a tear drop shape.

Sheep: Base coat the sheep in creamy white then float the shading around the edges with burnt umber. Add the black face, ears and legs by creating simple shapes with a 1/4 inch brush. With the 1/4 inch brush, paint a small blue square then add two dark red stripes. Stencil in a star on the blue square.

Border: Alternate dark red and creamy white using a half inch brush then float shading with burnt umber on both the inner and outer edges of the border.

Don's forget to add either sawtooth or wire hangers.

Tuesday, June 12, 2012

What to Paint on Old Wooden Bowls

Here are a few bits of inspiration if you're looking for designs to paint and decorate old wooden bowls you've grown tired of or found at a garage sale.

These bowls were assigned to me to decorate by Gramma Sophie's in Boonville, MO, where I have other items consigned.

NOTE: The bowls are meant for decoration only and are not to be used for food.

Preparation: I used 100 grit sandpaper to rough up the originally black in-and outsides of the bowls so the acrylic paint would adhere.

Both sides were then sprayed with a mixture of vinegar and water, and wiped clean and dry.

I painted a base color on the inside first, let dry and painted the outside also allowing it to dry. I think there are two to three coats on both sides. The colors were chosen for the owl bowls to represent 4th of July while the other bowl colors were my whims.

Owls: I loaded the owls' base colors onto a 1/2 inch brush then while using just the chisel edge from left to right, I made the "ear tufts" with a simple "u" shape then added a round body. After the paint dried, I filled in the wing shapes then added "feathers" once the wings dried.

The eyes were added with a small flat brush by pushing straight down and twirling the brush in a circle. The eye highlights were added by dipping the handle of the brush in white.

Curly Qs: The assorted colored curls were added using a liner brush tip.

I finished off by stenciling a star on the outside and spraying both interior and exterior with spray lacquer.
 Preparation for dragonfly bowl: Same as above.

Dragonflies: Using a liner brush, I painted random loops for the wings.

The bodies were added using black in a bottle with a liner tip.

Preparation for  the bird house: Same as above.

Bird house: For the house, I laid in basic shapes in different colors. After the paint dried, I added the round holes in black by twirling a small flat brush dipped in black.

Shadows and highlights were added once the bird house dried.

White daisies, vines, leaves and berries were randomly added using a simple one-stroke method.

Finish: Again, I sprayed lacquer on both sides of the bowls to protect the paint.

Have fun! You're welcome to use my ideas.

Please visit my online gift store, Visages, where my original art adorns a large assortment of gifts.

Below are just a few recently purchased items:

Monday, June 11, 2012

Project Idea for an Old Window

Paint a picture of a large flower (or item of your choice) in one corner then nail wood clothes pins on the frame to hold photos or other memorabilia.

Hanging: If you plan on hanging your window picture holder on the wall, use large eyelet screws and wire. You can buy them at most hardware stores, and the packaging will tell you how much of a load the screws and wire can hold.

I don't trust the saw tooth pictures hangers because it seems the nails aren't big enough or go into the wood far enough to be safe. I worry the nails will come out sending the window crashing to the floor.

Loose glass: Also, if the glass is loose in the frame, you can stabilize it by shoving push points (also found at the hardware store) into the wood surrounding the glass.

Place the push point flat side next to the glass. Using a flat head screw driver, gently begin pushing while rocking the push point back and forth until it works its way in to the wood.

Painting technique: The flower painting took several coats of acrylic paint. Be sure to let each coat dry thoroughly before applying the next coat.

Start with the back petals. Double load your 1-inch brush with a creamy white and dark yellow. Put in the general shapes of the petals.

Don't over-work the paint. You'll be disappointed when you see that going back over what you painted suddenly comes up leaving a bare spot.

Messed the whole darn thing up? No worries. Wet a paper towel and wipe off what you've done.

You can also use a box cutter blade or razor blade to scrape off the acrylic paint.

You can speed up the drying by using a hair dryer.

Keep adding layers of paint to the first layer of petals until you are satisfied with the appearance then begin with the second set (inner set) of petals.

Make the petals shorter and darker. I double loaded a 1-inch brush with gold and the dark yellow from the previous set of petals. Note the lighter colors are on the left; darker on the right.

The center of the flower was pounced in with a large round brush using a very dark brown like burnt umber.

After the center dries, pounce in tan highlights. Don't get carried away. Only put in a few pounces at a time until you achieve the effect.

Clothes pins: You can get these at Dollar General for - yes, you guessed it - a dollar.

I purchased and used small wire brad nails (#18 x 5/8) to attach the clothes pins to the window frame. Push one side of the pin over. If you push it too far, the clothes pin will come a part.

Voila! You have a unique and creative way to display photos, invitations, cards, awards and ribbons.

Please visit Visages Gift Store where you can find cards and gift items to personalize - or not.

Thanks for looking!

Visages Gift Store examples:


Thursday, June 7, 2012

What to Do with an Old Window Screen

If you're looking for something unique to do with an old window screen, here's a fun idea.

I grabbed my acrylic paints and set to work painting a birdhouse on a leafy vine-wrapped tree stump. First I used dark colors applying two or three coats. Next, I took bright yellow and highlighted areas to add definition.

You will want to spread newspaper or something underneath the screen because there will be a fine splatter of paint.

After it dried I sprayed a layer of lacquer over the paint to preserve it.

Lastly, I anchored and strung picture hanging wire to the back.

Today while I'm in Glasgow, MO, I'll take it to Glasgow Trading Post antique shop and gift store where it will hang for sale for only $10.
Now THAT'S a fun idea.

Looking for gifts you can personalize? Head to Visages to check out original art & designs you won't find anywhere else. Below are a couple of gift ideas.

Father's Day is June 17.

Tuesday, June 5, 2012

How to Make a Dime-'n-Pin Gag Gift


Making your own gifts is fun. Making your own gag gifts is even more fun.

This Dime-'n-Pin is a pun for diamond pin, and is used to generate surprise and a chuckle. When you ask someone “Would you like a dime-n-pin?” (say it quickly as you would diamond pin) the general response is, “Sure!”. When you produce and the recipient sees the the dime you have soldered on to a safety pin their first expression is puzzlement which is followed by laughter.

This is a good way to break the ice, have some fun, or to give as a unique gift.

Needed:

  1. Dime
  2. Safety pin – large enough to unclasp once it is soldered to the dime
  3. Solder – Radiator with flux
  4. Needle-nose Pliers (or needle-nose vice grips)
  5. Propane torch
  6. Lighter or matches
  7. Pan of water
  8. Solid work surface

Set up your work area in a safe place where propane and other fumes won't contaminate the air. Your table should be sturdy and not wobble so as not to upset the lit propane starting a fire. Once you have set the propane tank on your work table ensuring that it won't easily tip, twist the nozzle open just enough so that you hear a slight hiss.

Hold the lighter (or lit match) below the nozzle but up high enough that when you light the lighter the flame or spark will ignite the gas you hear hissing from the opening of the tank.

DO NOT FULLY OPEN THE NOZZLE. You want it open only enough to keep a steady flame.

Lay a safety pin on the back of a dime. The head stamped on the dime should be in the same upright position as and perpendicular to the safety latch of the pin. Clamp the needle-nose pliers on the edge of the dime making sure you have also clamped the pin. Slightly lift the pin so there is no problem unclasping the it when it is put on or taken off.

I like to use the needle-nose vice grips which are self-clamping so I don't have to concentrate on keeping the pliers closed with enough pressure to hold the pin and dime.

Hold the face of the dime in the flame and apply the solder with the other hand on the back surface of the dime also touching the bottom leg of the pin (the part of the pin that doesn't move). When the dime heats enough to melt the solder, remove it and the dime immediately from the flame as it will continue to melt covering more area than you want.

With the pin now soldered into place, remove it from the flame and dunk into a pan of water to cool the pliers as well as the dime.

This is a how-to article only. Use the instructions at your own risk.

New Father's Day gifts at Visages